ABRF Whitelisting Instructions
How to Whitelist an Email
If you’re wondering about how to whitelist an email, it can be frustrating not to be able to whitelist email and ensure that it makes it through your inbox filters. Digging through your spam folder to find the emails you need is an annoying process that detracts from your productivity. This article will cover how to whitelist an email in Gmail and other major email service providers. By the end, you’ll have all the information you need to avoid unnecessary blacklists and make sure that the emails you want to read show up in your inbox like they should.
What Does Whitelist Mean? You may be wondering what the whitelist meaning is at all, but that doesn’t mean you can’t benefit from knowing how to whitelist an email. Whitelisting an email involves telling your email provider that you want emails from that sender to be allowed into your inbox rather than being filtered into spam. It’s therefore important to understand what is whitelist in order to be able to avoid the problem of having emails removed unnecessarily and forcing you to look through spam for potentially important communications. A whitelist email address will always be allowed into your inbox, ensuring that your email account is working for you as much as possible. Not being able to whitelist email senders renders you unable to get notifications when you receive important emails that you need to read. Whatever email provider you use, it’s crucial to understand how to whitelist an email in order to make sure that nothing falls through the cracks.
Email addresses to Whitelist for ABRF mass communications: [email protected], [email protected] and [email protected].
How to Whitelist and Email in Gmail
If you’re using Gmail as your email provider, it’s easy to set things up so that a given sender is whitelisted for all future communications. The Gmail whitelist process can be done quickly through the web client:
- Click the settings button (in the top-right corner of the screen), then select “Settings” from the resulting drop-down menu.
- Navigate to the tab labeled “Filtered and Blocked Addresses” to access information about your existing filters.
- Select “Create a new filter” and enter the emails or domains you want to whitelist.
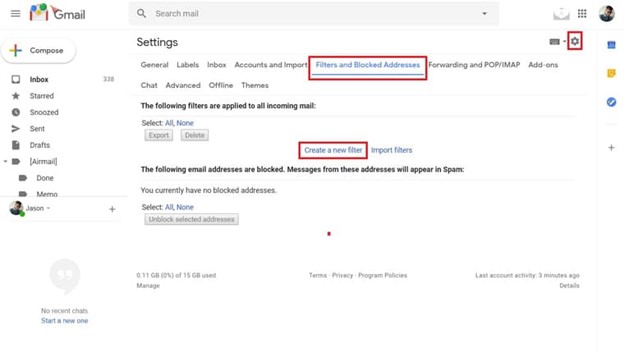
To whitelist a single email address, for example, type the entire address. On the other hand, if you’re trying to whitelist every sender from a certain domain, type the domain alone, such as “@abrf.memberclicks.net”. This will tell Gmail to approve every email from an ABRF/MemberClicks sender. Click “Create filter” to approve the new filter, then mark “Never send to Spam” to whitelist every email within the filter. You can also choose to Star these emails, apply a given label, or mark them as important.
How to Whitelist an Email in Outlook
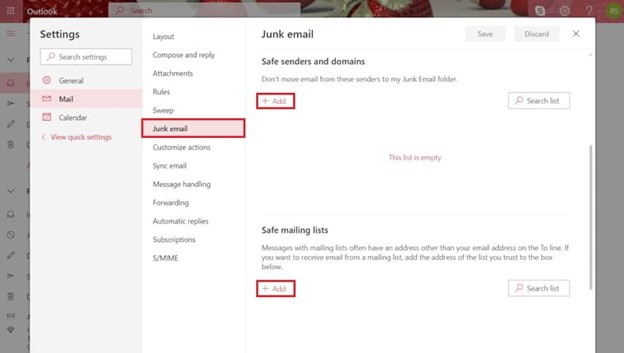
Whitelisting a domain or specific email address in Outlook.com is just as easy and works by adding the address or domain in question to a group called “safe senders”. An address that has been added to safe senders will be pushed to your inbox regardless of your spam filters. To add an address or domain to safe senders:
-
Click on “Settings”, then “View all Outlook settings”.
-
Go to “Junk email”, then choose “Safe senders and domains” or “Safe mailing lists” to select the domain or email you want to whitelist.
-
Enter the domain name or email address you wish to add to Safe senders. Make sure to include the @ character for domain names in order to only whitelist emails with the exact string of characters you entered (and nothing more).
Alternatively, you can simply add an individual email address that has sent you an email to your Outlook Contacts. Though they lead to the same result, this method is quicker and more efficient than manually entering information. How to Whitelist a Domain in Mac OS X MailTo whitelist all email from a specific domain in the Mail app in Mac OS X or macOS:
-
Select Mail | Preferences from the menu bar in Mac OS X Mail. Click the Rules tab.
-
Click Add Rule.
-
Type a name in the Description field, such as "Whitelist: abrf.memberclicks.net" and "Whitelist: abrf.org" to identify the new rule.
-
Make sure the criteria reads If any of the following conditions are met and that the From field is followed by Ends with.
-
Enter the domain name you want to whitelist in the field next to the Ends with field. Add an @ sign before the domain name to make the filter specific. For example, to whitelist all mail from the abrf.memberclicks.net domain type "@abrf.memberclicks.net" & "@abrf.org" into the field.
-
Click the plus sign next to the last condition to add another domain with the same criteria if you want to whitelist several domains.
-
In the Perform the following actions section set the three fields to Move Message, to the mailbox, and Inbox or a different target folder.
-
Click OK to save the rule.
-
Close the Rules window.
To make sure the rule is executed before other rules that might act on the same message for other reasons, drag it near the top of the rules list. If you have a filter that color-codes certain messages based on keywords in the subject, for example, make sure the domain whitelist rule is above that labeling rule.
|